
参考这个教学
- 制作物体
- 涂底色( 用Texture paint): 设置uv展开, 在3维viewport中涂色, 实际把颜色涂在2维的 uv图上
- 在Edit Mode下设置uv展开: Smart UV Project
- 用Mix shader 控制
- 在shader里设置两个material: base material 和 paint material, 用Mix shader连在一起
- 比如: Principle BSDF + Shader to RGB + Color Ramp
- 在Texture paint下, Texture Slot 中添加 material -> base color
- 颜色设为黑色
- 把生成的material 的node 连接到Mix shader的 Fac(可能这个texture slot中直接弄material不方便, 所以只用一个深度的功能, 把material混合放在mix shader里?)
- 在shader里设置两个material: base material 和 paint material, 用Mix shader连在一起
- 在物体上涂色
- 给固定主体添加抖动的外轮廓: 模拟画画的线稿
- 添加line art: Grease Pencil -> Collection Line Art
- modifier -> Line Art 调解轮廓位置, 粗细, 透明度
- Edge Types Create
- Individual Silhouette(剪影): 给物体的外轮廓创建line art
- 去掉 Crease(褶皱): 不然不止外轮廓, 所有面向正面的边缘都会添加line art
- 去掉 intersection: 不然面和面相交的地方(阴影)也会添加line art
- Edge Types Create
- modifier -> noise
- 调整 position(位置的随机性), strength(透明度的随机性), thickness, noise scale
- modifier -> Line Art 调解轮廓位置, 粗细, 透明度
- 同位置添加一个带dot dash的line art: 表现有粗有细的笔触效果
- modifier -> Dot dash
- 调整 Dash, Gap : 笔触断开的比例
- modifier -> Dot dash
- 添加line art: Grease Pencil -> Collection Line Art
- 涂细节
- 添加GreasePencil Object
- 添加noise modifier: 模拟笔触效果
- 设置Object -> Visibility
- 选中 Grease Pencil -> Use Lights: 让画面受灯光影响, 是Grease Pencil独有的property
- 设置 Object -> Viewport Display
- 选中 Show -> In Front: 让画画涂层在最前面
- 去掉 Data -> Layers -> Opacity -> Use Lights 设置上面涂层不变透明?, 去掉之后就按正常的混合图层模式理解
- 添加多个不同颜色 material
- 在Material -> Surface -> Stroke -> Base Color调整颜色
- 在Material -> Surface -> Fill 调整circle里面fill的颜色
- 设置Draw Mode,
- 设置绘画平面: 通过Stroke Placement
- 设置stroke:
- 设置 Tool -> Brush Setting -> Stroke -> Stablilize Stroke -> Radius = 10px
- 添加GreasePencil Object
- 设置动画
- 把同样动画的笔触分离
- 用auto key 记录最终形态(2)
- 选中第一帧(1) shift+D 复制, 移到最终帧之后(3), 把时间线移到 (2),(3) 中间
- 在Edit Mode里, 用Grease Pencil -> Interpolate Sequence 插入中间key frame
UV贴图
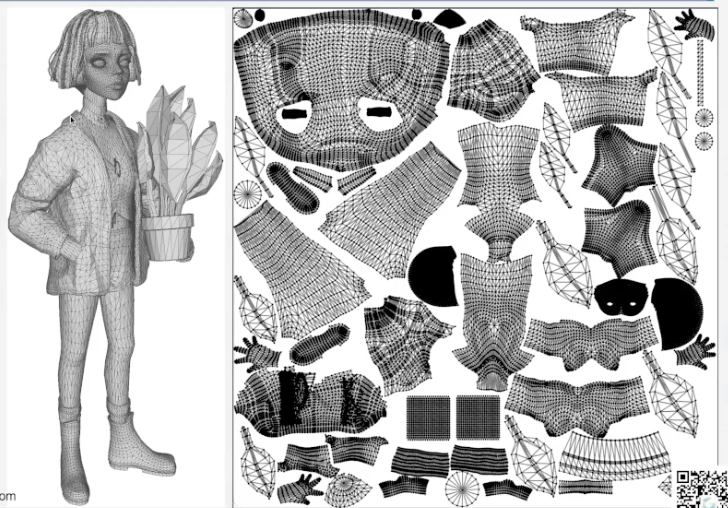
- Smart UV Project : 从mesh一个顶点相邻面扩散展开, 检查顶点处的角度
draw mode
通过Stroke Placement 切换绘画平面
- Origin(默认), 在object的origin :
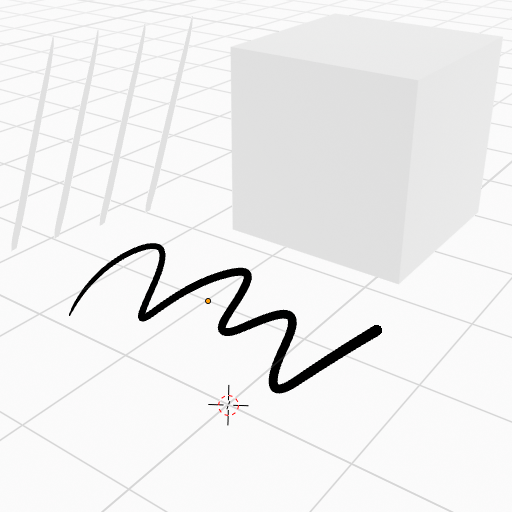 一般不用…Object的origin不知道在哪
 - 3d cursor(光标), 可以移动cursor放在想要的平面
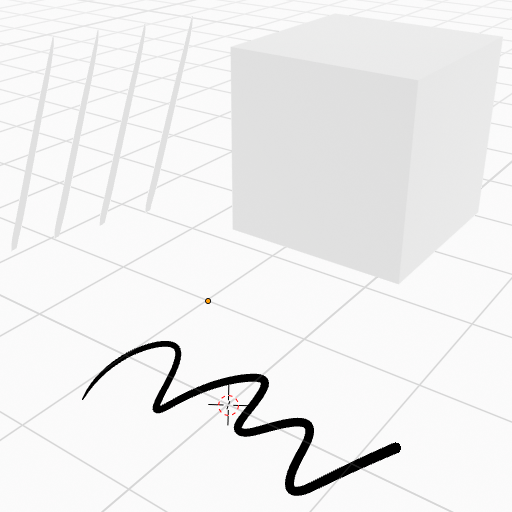 在Cursor点的位置所在的View的平面上画画
 - Surface
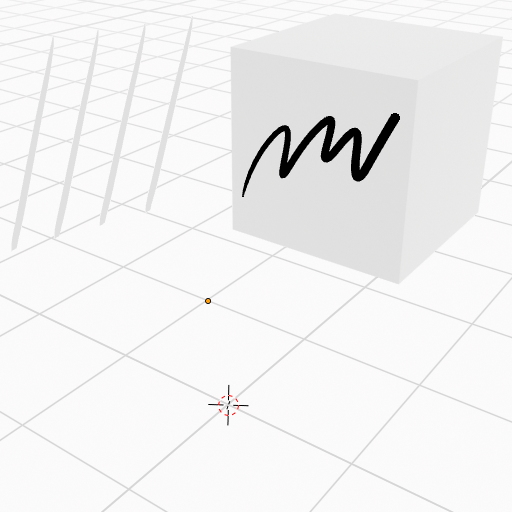 Offset(离mesh的距离 )设成0.01